I’ve been asked to make a tutorial outlining how to make an easy shadow effect in GIMPshop. So, here you go.
First things first; you need your image. Make sure it has a transparent background, or the rest of these steps won’t work.
Here’s one I made earlier ^^

Next, copy and paste your image onto a new layer on your background. Again, make sure it’s a new layer, or the rest of the steps won’t work

Now, go to ‘Filters’, ‘Light and Shadow’ and select ‘Drop Shadow’. You can play around with the levels on this, but I’ll just stick with the preset level for this tutorial.

You should now end up with something like this

But this shadow just makes it look like your character is floating above a flat background. That’s not what you want. So, click on the layer containing you shadow. Next, go to the Toolbox and select ‘Shear Tool’. Using this, twist your shadow so it’s at an angle to your character, like this
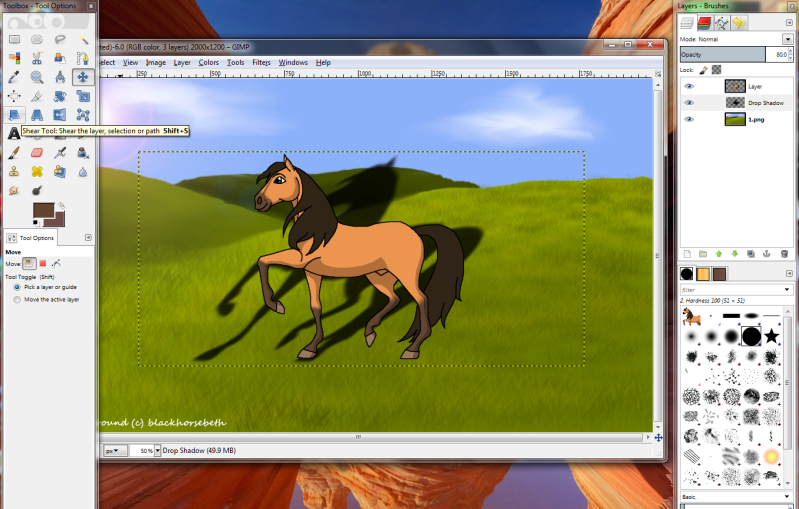
Now you need to use the Move Tool to position your shadow so the feet line up. Then use the Scale Tool to make it the right size. Longer/larger shadows depict lower light, such as sunrise/sunset, so choose the length you feel is most appropriate to your background’s time of day.

But this shadow is very dark, so next go to the Opacity scale on your Layer’s toolbox, and reduce the opacity of the image to the level you want. Finally, go to ‘Image’ and choose ‘Flatten Image’. This is what your final picture will look like ^^ (and please ignore the fact that the shadow's on the wrong side of Spirit; I was doing this quickly as an example ^^; )

_________________

Huge thank you to Roiffalo for help with sorting out my signature ^^


