After I promised quite a few people to make a tutorial of how I create my renders it seems to be about time I actually do it.
Over the years I have been working with different programs and used several techniques. I started out PhotoImpression4, a simple software that came with a camera. It was basically like MS paint but with layers. he my computer crashed and I lost the program, leaving me forced to find something new to work with. I tried Paint.net but it´s just not my thing. Soo after that I downloaded GIMP. It took a little while to get used to it and understand how the tools work. (Still trying to figure out some) I have been trying my hand at Photoshop (CS2, CS4 and Elements 2) but it´s way too complicated for me. (Funny how PS users tell me that GIMP is complicated) Same with Paint tool Sai. There is only thing that hasn´t changed (yet), my tool to draw(render). Ever since I started I have been using a simple ol´ mouse. But that´s going to change soon, getting a tablet for christmas.
Anyways. You want to know how I render? Then let´s go.
First off get to know your program. Open a blank canvas and fool around with it. Try as many tools as possible, read tutorials designed for your program. I am not going to explain the tools here. You can ask GIMP-specific questions though.
I guess this tutorial might be useful to anyone who works with a picture editing software that can handle layers. If you don´t have such a program I recomment you looking up those MS paint tutorials on the forum or think about downloading GIMP or Paint.net (or buying Photoshop if you like) I am explaining this GIMP-centric (mostly the brush settings and stuff) so you´ll have to figure out equal settings on the program of your choice.
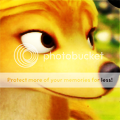
To start off, choose a screencap of your choice and open it in whatever program you use.

At first you need your lineart. Open a transparent layer OVER the screencap. (I use a white layer under the screencap and lower the screencap´s opacity to make it easier to see my lines but that´s optional) Use the brush too on the smallest circle setting and scale it to 1.50. This will give you rather smooth lines. Don´t stick too much with the original lines while outlining try using them as guidelines and add your own features. Play around with the character´s expression, add fluff or take some away, change the ear-shape, morph two or more screencaps together... Set your screencap layer invisible from time to time to check if you need to improve your lines somewhere. (The white layer underneath helps here too) Don´t forget to save regulary!

After finishing your lineart, set a new layer (transparent of corse) UNDER your lineart and color it. You can color any way you want. Do it by hand using the brush tool or use the lasso tool. I use a mix of both. You really have to find a way you´re comfortable with. You don´t have to color all on one layer.

After coloring morph the lineart and all color layers together. (Check for any errors and uncolored spots first) So your render is just a single layer now. Copy that layer.

Got to "color" and choose "toning" or similar. It should give you this window:

Color one of your 2 renders-layers into a rather dark color (NEVER USE BLACK) Note: leave the second render-layer untouched.

Add a background of your choice. This will help you with shading.

Cut away all highlighted areas using either the lasso or eraser tool. (I prefer the lasso tool) (Of course you gotta cut away those areas on your toned layer ONLY.) You can blur those areas if you like.

Lower the opacity of your shading layer to your liking. Those who like transparent backgrounds can delete all layers excepts the render and shading one now and save it as .png (attention, AS does not supporst .png transparency in galleries, you can fake it by using the website´s background as your image´s background however) or non animated .gif.

Add some light effects if you like to and tadaaa, your render is done.
Fullview of the example render here:
/balto/en ... umart=6917Enjoy!